Watercolor painting is beloved for its spontaneity and transparency, but preserving crisp white areas can be challenging. This is where masking fluid and rubber cement erasers become essential tools. Whether you’re painting sunlight reflections, intricate details, or layered compositions, mastering these materials will elevate your work. Below is a practical guide to using them effectively.
1. Understanding Masking Fluid: The Basics
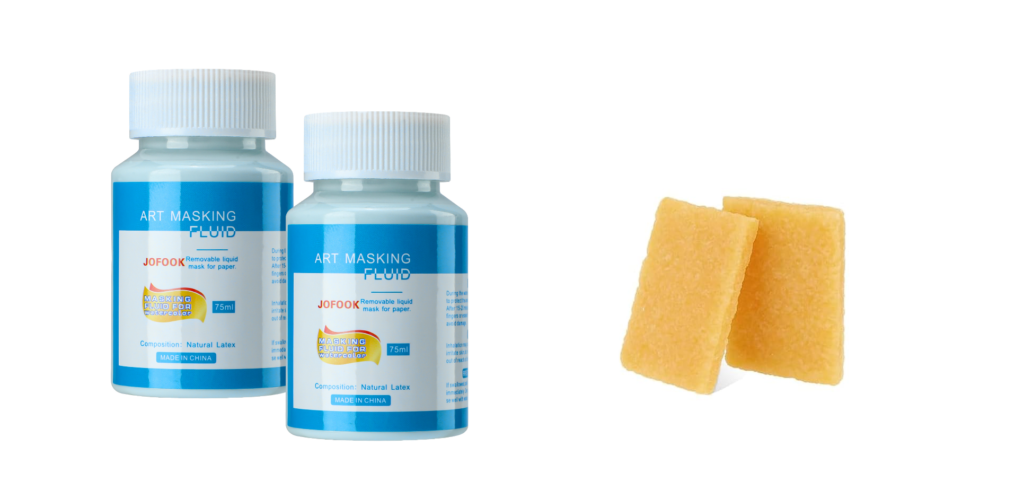
Masking fluid (or liquid frisket) is a latex-based solution that acts as a temporary barrier on paper. When applied, it dries into a rubbery film, protecting covered areas from paint. Ideal for preserving highlights, text, or complex patterns, it’s available in clear or tinted versions (blue or yellow tints improve visibility). Note that masking fluid can dry out brushes, so use synthetic brushes or dedicated tools like silicone-tip applicators.
Pro Tip: Test the fluid on a scrap piece of paper first. Some cheaper brands may stain or tear delicate paper surfaces.
2. Applying Masking Fluid: Techniques for Precision
Start with a clean, dry surface. Shake the bottle well, then apply the fluid using:
Brushes: Dip synthetic brushes in fluid and paint shapes freely. Rinse immediately with soapy water to prevent hardening.
Silicone Tools: Use tapered silicone pens for fine lines or dots.
Avoid thick layers—thin, even coats dry faster and peel off cleanly. Let the fluid dry completely (15–30 minutes) before painting. For multi-layer masking, apply fluid in stages, working from lightest to darkest paint layers.
Warning: Never use masking fluid over wet paper or watercolor layers—it will smudge and bond permanently.
3. Painting Over Masking Fluid: What to Watch For
Once the fluid is dry, paint as usual. Watercolor will flow around the masked areas, creating sharp edges. Keep these points in mind:
Avoid Overworking: Brushing repeatedly over masked edges may cause seepage.
Layer Strategically: Apply lighter washes first, then build darker tones.
Check for Gaps: Shine a light at an angle to spot uncovered areas needing touch-ups.
Masking fluid withstands light to moderate washes but isn’t indestructible. Heavy scrubbing or soaking can dislodge it prematurely.
4. Removing Masking Fluid: The Art of Peeling
After the paint dries completely, it’s time to reveal your preserved whites. Use a rubber cement eraser (a soft, kneadable rubber tool) to lift the film:
Gently rub the eraser over the dried fluid in circular motions.
Roll the eraser to collect residue—this prevents smudging.
For stubborn bits, use clean fingertips to peel edges slowly.
Avoid using regular erasers, which can scratch paper. If fluid resists removal, let the painting dry longer—damp paper may cause tearing.
Critical Note: Remove masking fluid within 1–2 days. Leaving it on for weeks can make it brittle and harder to peel.
5. Troubleshooting Common Issues
Even experienced artists face challenges. Here’s how to fix them:
Torn Paper: Caused by aggressive peeling or low-quality paper. Sand lightly with fine-grit paper to smooth the surface.
Staining: Tinted fluid may leave traces. Gently dab the area with a white vinyl eraser or lift stains with a damp brush.
Fuzzy Edges: If paint bleeds under the mask, the fluid was applied too thinly. Next time, use two thin coats.
For accidental spills, let the fluid dry completely before carefully erasing it. Never wipe wet fluid—it will spread.
6. Advanced Applications & Creative Ideas
Once you’ve mastered the basics, experiment with these techniques:
Salt Effects: Apply masking fluid where you plan to sprinkle salt for textured highlights.
Mixed Media: Combine masking fluid with ink or gouache for bold contrasts.
Store masking fluid tightly sealed in a cool place. If it thickens, add a few drops of ammonia or water (check the label first).
Final Thoughts
Masking fluid and rubber cement erasers are game-changers for watercolor artists. They bridge the gap between controlled precision and watercolor’s fluid beauty. Like any tool, practice is key—start with simple projects (e.g., preserving sunlit clouds or window reflections) before tackling intricate designs. Remember, the goal isn’t perfection but intentionality. With patience, you’ll unlock new creative possibilities while keeping those whites brilliantly untouched.